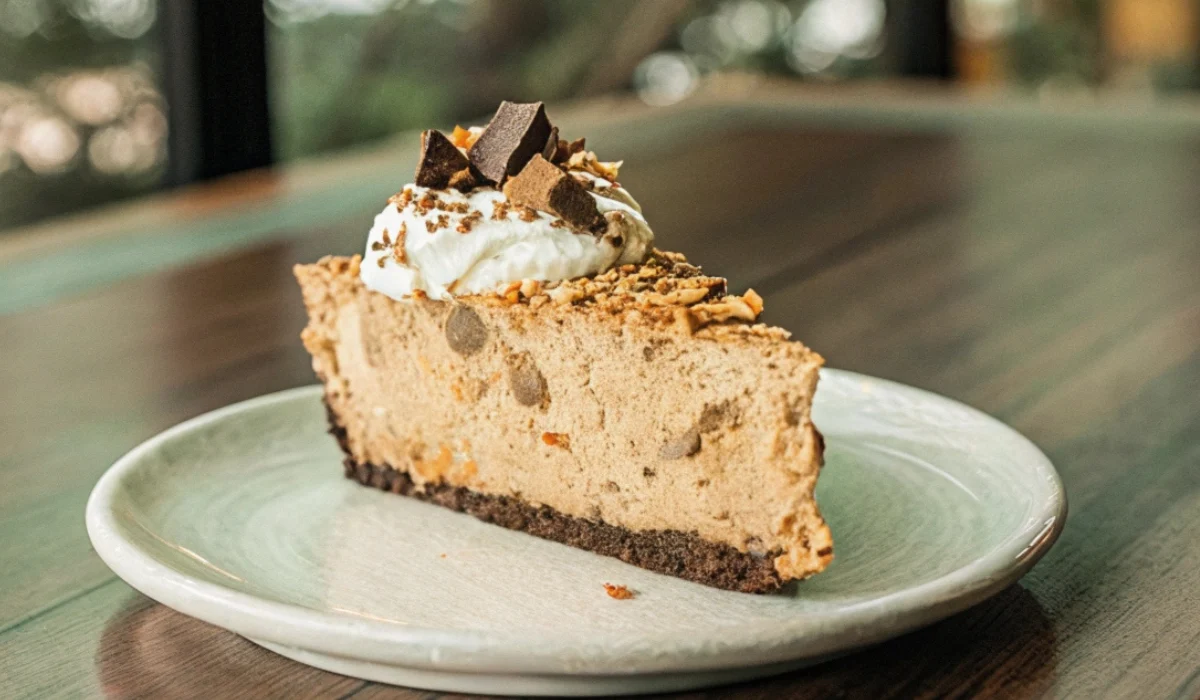
Craving a dessert that’s both easy to make and impossible to resist? Say hello to this Butterfinger Dessert—a no-bake masterpiece that combines the crunchy, chocolatey goodness of Butterfinger candy bars with a creamy peanut butter filling. Whether you’re hosting a party, surprising your family, or simply treating yourself, this dessert is a guaranteed crowd-pleaser.
Imagine layers of buttery graham cracker crust, velvety peanut butter cream, and a generous topping of crushed Butterfingers, all finished with a drizzle of rich chocolate syrup. Sounds dreamy, right? The best part? It’s so simple to whip up, you’ll wonder why you haven’t made it sooner.
Perfect for busy weeknights or special occasions, this recipe is as versatile as it is delicious. Plus, it’s a fantastic make-ahead option for stress-free entertaining. Ready to dive into this indulgent treat? Let’s get started!
Table of Contents
Why You’ll Adore This Butterfinger Dessert
If you’re looking for a dessert that’s as easy to make as it is delicious, this Butterfinger Dessert is your answer. Here’s why you’ll love it:
- No-Bake Convenience: Skip the oven and let your refrigerator do the work. Perfect for hot summer days or when you’re short on time.
- Crowd-Pleasing Flavor: The combination of crunchy Butterfinger bars, creamy peanut butter, and rich chocolate is a universal favorite.
- Family-Friendly: Kids and adults alike will go crazy for this treat—it’s a hit at birthdays, potlucks, and holiday gatherings.
- Make-Ahead Magic: Prepare it the night before and let it chill, so you’re ready to impress without the last-minute stress.
- Endless Customization: Swap ingredients or add your own twist to make it uniquely yours.
This dessert isn’t just a recipe—it’s a solution for busy schedules, picky eaters, and sweet tooth cravings. Plus, it’s so simple that even beginner cooks can nail it on the first try. Ready to create a dessert that’ll have everyone asking for seconds? Let’s dive into the ingredients and steps!
What You’ll Need to Make This Irresistible Dessert
Gathering the right ingredients is the first step to creating this irresistible Butterfinger Dessert. Here’s everything you’ll need to whip up this no-bake delight:
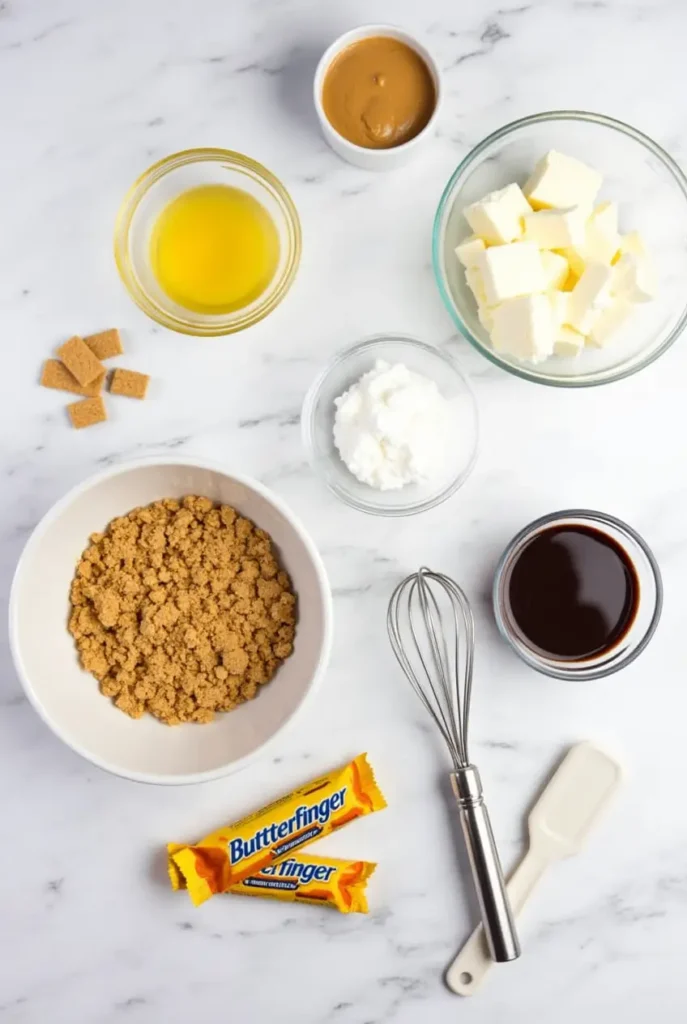
For the Crust:
- 2 cups crushed graham crackers: These create a buttery, slightly sweet base. For a gluten-free option, swap in gluten-free graham crackers or almond flour.
- 1/2 cup unsalted butter, melted: This binds the crust together and adds a rich, indulgent flavor.
- 2 tablespoons granulated sugar: A touch of sweetness to balance the graham crackers.
For the Filling:
- 8 oz cream cheese, softened: The creamy foundation of the filling. Let it sit out until it reaches room temperature for easy mixing.
- 1 cup powdered sugar: Adds sweetness and helps thicken the filling.
- 1 cup creamy peanut butter: The star ingredient that pairs perfectly with Butterfinger. Use natural peanut butter for a healthier twist.
- 1 teaspoon vanilla extract: Adds a subtle, warm flavor that ties everything together.
- 1 1/2 cups heavy cream, whipped to stiff peaks: Creates a light and fluffy texture for the filling.
For the Topping:
- 1 1/2 cups crushed Butterfinger candy bars: About 8 full-size bars. This gives the dessert its signature crunch and flavor.
- 1/2 cup chocolate syrup: For drizzling over the top. You can also use melted chocolate or caramel sauce for variety.
- Optional: Extra whipped cream and Butterfinger crumbs for garnish.
Pro Tips for Ingredient Prep:
- Crush Butterfingers Easily: Place the candy bars in a zip-top bag and use a rolling pin to crush them into small, even pieces.
- Softening Cream Cheese: If you forgot to take it out of the fridge, microwave it for 10-15 seconds to soften it quickly.
- Whipping Cream: Chill your mixing bowl and beaters in the freezer for 10 minutes before whipping the cream for the best results.
With these ingredients prepped and ready, you’re just steps away from creating a dessert that’s as enjoyable to prepare as it is to devour.
Step-by-Step Guide to Perfect Butterfinger Dessert
Ready to bring this Butterfinger Dessert to life? Follow these simple, step-by-step instructions to create a treat that’s as fun to make as it is to eat. Let’s get started!
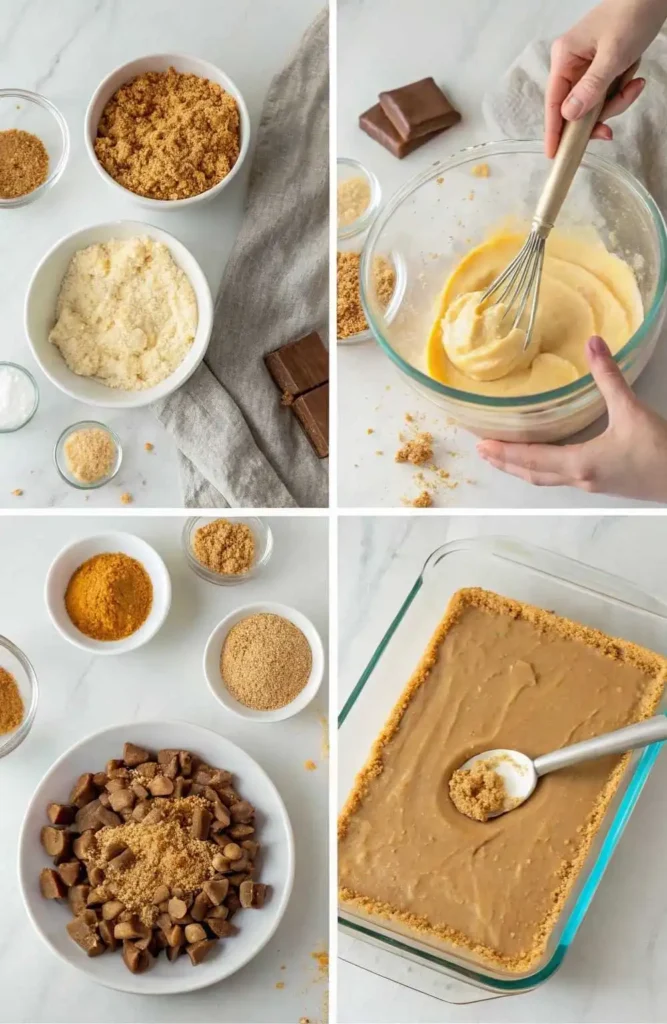
Step 1: Prepare the Crust
- In a bowl, mix 2 cups of crushed graham crackers, 1/2 cup of melted unsalted butter, and 2 tablespoons of sugar. Stir until the mixture is evenly moistened and has a sandy texture.
- Press the mixture firmly into the bottom of a 9×13-inch baking dish, making a smooth and even layer.Use the back of a spoon or a measuring cup to help compact it.
- Pop the dish into the refrigerator to chill while you work on the filling. This step helps the crust firm up and makes layering easier.
Step 2: Make the Filling
- In a large bowl, beat 8 oz softened cream cheese until it’s completely smooth and free of lumps. This ensures a silky base for your filling.
- Add 1 cup powdered sugar, 1 cup creamy peanut butter, and 1 teaspoon vanilla extract. Mix until fully combined and creamy.
- In a separate bowl, beat 1 1/2 cups of heavy cream until stiff peaks form. Keep an eye on it to avoid overwhipping, which can make the cream grainy.
- Use a spatula to gently fold the whipped cream into the cream cheese mixture. This keeps the filling soft and airy.
Step 3: Assemble the Dessert
- Remove the crust from the refrigerator and spread the filling evenly over the top. Use a spatula to smooth it out for a polished look.
- Sprinkle 1 1/2 cups crushed Butterfinger bars generously over the filling. This adds the signature crunch and flavor.
- Drizzle 1/2 cup chocolate syrup over the top in a zigzag pattern or swirls for a touch of elegance.
Step 4: Chill and Serve
- Cover the dessert with plastic wrap and refrigerate for at least 2 hours (or overnight) to allow it to set. This step is crucial for the perfect texture.
- Before serving, garnish with extra whipped cream and a sprinkle of Butterfinger crumbs for a stunning presentation.
Pro Tips for Success:
- Chill Your Tools: For easier whipping, chill your mixing bowl and beaters in the freezer for 10 minutes before starting.
- Even Layers: Use an offset spatula to spread the filling smoothly and evenly over the crust.
- Customize the Topping: Add a drizzle of caramel sauce or a handful of mini chocolate chips for extra flair.
With these easy steps, you’ll have a show-stopping dessert that’s sure to impress. Now, let’s talk about how to serve and enjoy it!
Expert Tips and Creative Twists for Your Dessert
Want to take your Butterfinger Dessert to the next level? Here are some expert tips and creative variations to make this recipe your own. Whether you’re looking to simplify, customize, or elevate, these ideas will help you create a dessert that’s uniquely yours.
Pro Tips for Success
- Chill Your Tools: For the fluffiest whipped cream, chill your mixing bowl and beaters in the freezer for 10 minutes before starting.
- Even Layers: Use an offset spatula to spread the filling smoothly and evenly over the crust for a polished look.
- Crush Butterfingers Easily: Place the candy bars in a zip-top bag and use a rolling pin to crush them into small, even pieces.
- Make-Ahead Magic: Preparing the dessert the night before not only saves you time but also gives the flavors a chance to blend perfectly.
- Clean Cuts: For neat slices, dip a sharp knife in hot water, wipe it dry, and cut the dessert while it’s still cold.
Creative Variations
- Gluten-Free Option: Swap graham crackers for gluten-free cookies or almond flour to make this dessert gluten-free.
- Vegan Adaptation: Use vegan cream cheese, dairy-free whipped cream, and plant-based butter. Check that your Butterfinger alternative is vegan-friendly.
- Nut-Free Version: Replace peanut butter with sunflower seed butter and use a nut-free candy bar for the topping.
- Caramel Twist: Add a layer of caramel sauce between the crust and filling for a sweet, gooey surprise.
- Chocolate Lover’s Dream: Mix mini chocolate chips into the filling or use a chocolate graham cracker crust for extra indulgence.
- Individual Servings: Layer the dessert in small mason jars or dessert glasses for a portable, party-ready treat.
Storage Tips
- Refrigerator: Keep any leftovers in an airtight container, and they’ll stay fresh and delicious for up to 3 days.
- Freezer: For longer storage, freeze the dessert (without garnishes) for up to 1 month. Thaw in the fridge before serving.
With these tips and variations, you can adapt this Butterfinger Dessert to suit any occasion or dietary need. Now, let’s talk about how to serve it in style!
How to Serve and Present Your Butterfinger Dessert
Now that your Butterfinger Dessert is ready, it’s time to serve it up in style! Here are some creative and practical ideas to make your dessert the star of the show, whether you’re hosting a party or enjoying a cozy night in.
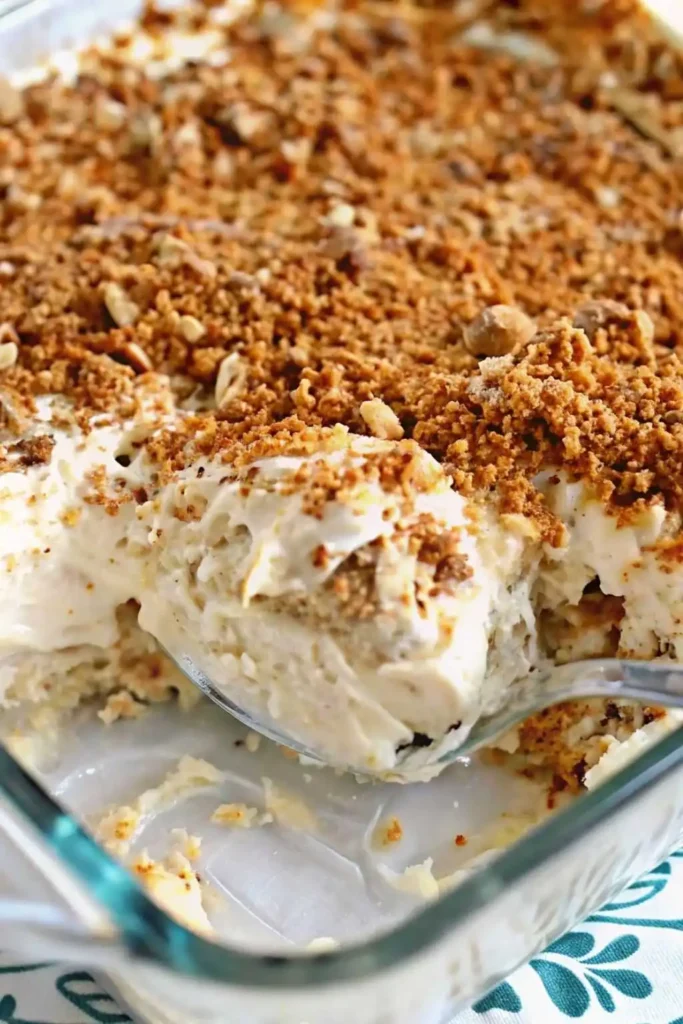
Presentation Ideas
- Individual Portions: Layer the dessert in small mason jars, dessert glasses, or ramekins for a personalized touch. Perfect for parties or potlucks!
- Elegant Plating: Use a round cookie cutter to create neat, restaurant-style portions. Drizzle extra chocolate syrup or caramel sauce around the plate for a professional finish.
- Seasonal Flair: Add a festive touch with holiday-themed garnishes, like crushed peppermint candies for Christmas or pastel sprinkles for Easter.
Pairing Suggestions
- With Ice Cream: Serve a slice alongside a scoop of vanilla or chocolate ice cream for an indulgent treat.
- Coffee or Milk: Pair the dessert with a cup of hot coffee, cold milk, or even a creamy latte to balance the sweetness.
- Fresh Fruit: Add a side of fresh berries, like strawberries or raspberries, for a refreshing contrast to the rich flavors.
Occasion-Serving Ideas
- Party Perfect: Cut the dessert into bite-sized squares and serve on a platter for easy sharing at gatherings.
- Family Dessert Night: Let everyone customize their servings with extra toppings like whipped cream, caramel drizzle, or extra Butterfinger crumbs.
- Holiday Celebrations: Double the recipe and serve it in a large trifle dish for a stunning centerpiece at holiday dinners.
Pro Tips for Serving
- Chill Before Serving: For the best texture, let the dessert chill for at least 2 hours before serving.
- Garnish Last: Add whipped cream, chocolate syrup, or extra Butterfinger crumbs just before serving to keep them fresh and crunchy.
- Use the Right Tools: A sharp knife or pie server makes it easy to cut clean slices without squishing the layers.
With these serving suggestions, your Butterfinger Dessert will not only taste amazing but also look like it came straight from a bakery. Now, let’s wrap things up with some final thoughts!
__________________________________________________________________
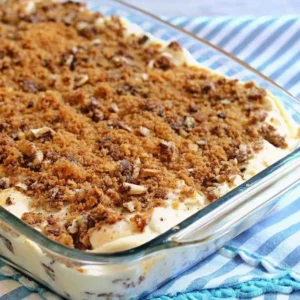
butterfinger dessert
Ingredients
For the Crust:
- 2 cups crushed graham crackers
- ½ cup unsalted butter melted
- 2 tablespoons granulated sugar
For the Filling:
- 8 oz cream cheese softened
- 1 cup powdered sugar
- 1 cup creamy peanut butter
- 1 teaspoon vanilla extract
- 1 ½ cups heavy cream whipped to stiff peaks
For the Topping:
- 1 ½ cups crushed Butterfinger candy bars about 8 full-size bars
- ½ cup chocolate syrup
- Optional: Extra whipped cream and Butterfinger crumbs for garnish
Instructions
Step 1: Prepare the Crust
- In a mixing bowl, combine 2 cups crushed graham crackers, 1/2 cup melted unsalted butter, and 2 tablespoons granulated sugar. Mix until the crumbs are evenly coated.
- Press the mixture firmly into the bottom of a 9×13-inch baking dish to form an even layer. Use the back of a spoon or a measuring cup to compact it.
- Place the dish in the refrigerator to chill while you prepare the filling.
Step 2: Make the Filling
- In a large bowl, beat 8 oz softened cream cheese until smooth and creamy.
- Add 1 cup powdered sugar, 1 cup creamy peanut butter, and 1 teaspoon vanilla extract. Mix until fully combined and silky.
- In a separate bowl, whip 1 1/2 cups heavy cream until stiff peaks form. Be careful not to overwhip.
- Gently fold the whipped cream into the cream cheese mixture using a spatula.
Step 3: Assemble the Dessert
- Remove the crust from the refrigerator and spread the filling evenly over the top. Use a spatula to smooth it out.
- Sprinkle 1 1/2 cups crushed Butterfinger bars generously over the filling.
- Drizzle 1/2 cup chocolate syrup over the top in a zigzag pattern or swirls.
Step 4: Chill and Serve
- Cover the dessert with plastic wrap and refrigerate for at least 2 hours (or overnight) to allow it to set.
- Before serving, garnish with extra whipped cream and a sprinkle of Butterfinger crumbs, if desired.
Notes
- Calories: 420 kcal
- Fat: 28g
- Saturated Fat: 12g
- Protein: 8g
- Carbohydrates: 38g
- Sugar: 28g
- Fiber: 2g
- Cholesterol: 45mg
- Sodium: 220mg
Final Thoughts on This Delicious Butterfinger Dessert
There you have it—your ultimate guide to creating a show-stopping Butterfinger Dessert! This no-bake treat is the perfect combination of creamy, crunchy, and indulgent, making it a hit for any occasion. Whether you’re serving it at a party, enjoying it with family, or treating yourself to a sweet moment, this dessert is sure to bring smiles all around.
With its effortless preparation, crowd-pleasing flavors, and endless customization options, this recipe is proof that you don’t need to be a professional baker to create something extraordinary. So, grab your ingredients, follow the steps, and get ready to enjoy a treat that’s as fun to make as it is to eat.
Don’t forget to share your creations with friends and family, and let us know how it turned out in the comments below. Happy baking—or rather, happy no-baking!
FAQS
How long are Butterfingers good for?
Unopened Butterfinger candy bars typically last about 6-8 months when stored in a cool, dry place. Once opened, they’re best enjoyed within a few weeks. For this dessert, using fresh Butterfingers ensures the best crunch and flavor!
Does Butterfinger have dairy?
Yes, Butterfinger contains dairy in the form of milk and whey. If you’re making a dairy-free version of this dessert, look for a vegan or dairy-free alternative to Butterfinger.
What does Butterfinger taste like?
Butterfingers have a unique flavor profile—crunchy, buttery, and slightly sweet with a rich peanut butter center coated in a layer of chocolate. The combination of textures and flavors makes them a beloved treat!
What does Butterfinger contain?
Butterfinger ingredients include corn syrup, sugar, peanuts, vegetable oil, cocoa, and dairy products like milk and whey. Always check the label if you have dietary restrictions or allergies.
Why are Butterfingers popular?
Butterfingers are popular because of their distinctive texture and flavor. The crispy, flaky layers paired with creamy peanut butter and chocolate create a satisfying treat that’s both nostalgic and delicious. Plus, they’re versatile—perfect for snacking, baking, or adding to desserts like this one!

