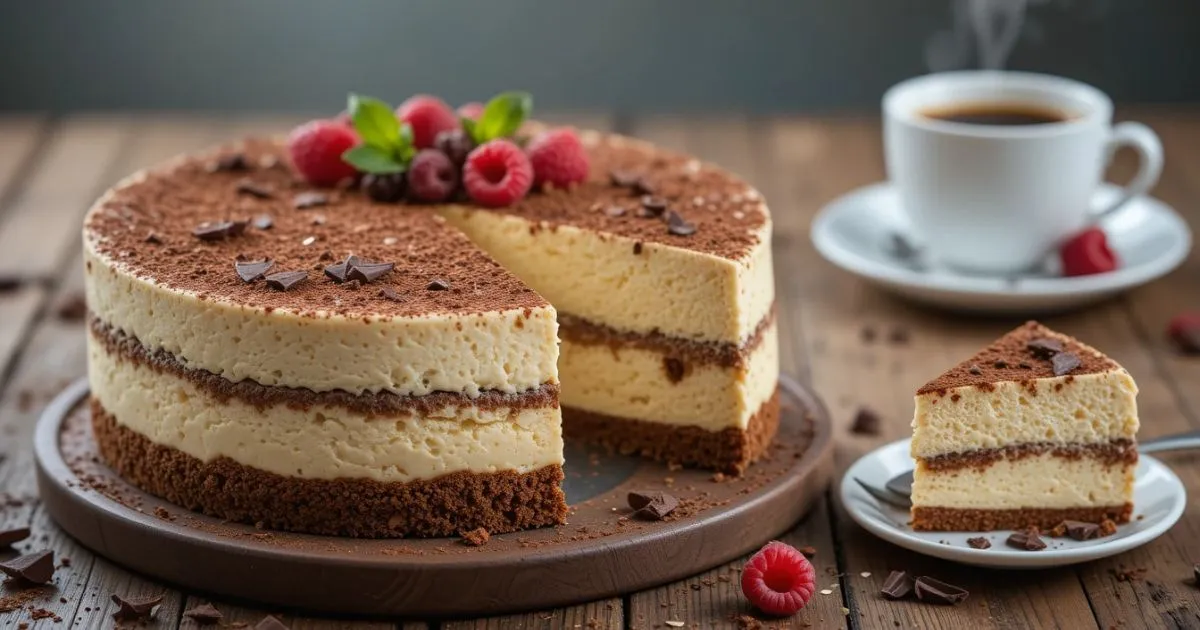
Imagine combining the rich, coffee-kissed layers of a classic tiramisu with the creamy, indulgent texture of a cheesecake. Sounds like a dream, right? That’s exactly what this Tiramisu Cheesecake delivers—a no-bake dessert that’s as easy to make as it is decadent to eat. Whether you’re hosting a dinner party, celebrating a special occasion, or simply treating yourself, this Italian-inspired fusion is guaranteed to impress.
With its velvety mascarpone filling, delicate ladyfinger base, and a dusting of cocoa powder, every bite is a perfect balance of coffee and cream. Plus, it’s a crowd-pleaser that requires minimal effort—no oven needed! Are you ready to create a dessert that’s as beautiful as it is delicious? Let’s dive in and whip up something truly unforgettable.
Table of Contents
Table of Contents
Why You’ll Love This Tiramisu Cheesecake Recipe
If you’re looking for a dessert that’s both show-stopping and surprisingly simple, this Tiramisu Cheesecake is your answer. Here’s why it’s a must-try:
- No-Bake Wonder: Skip the oven and let your fridge do the work! This recipe is perfect for warm weather or when you’re short on time but still want something extraordinary.
- Crowd-Pleasing Flavor: Combining the best of tiramisu and cheesecake, this dessert is a hit with both coffee lovers and dessert enthusiasts. Its rich, creamy texture and balanced coffee-chocolate flavors are irresistible.
- Versatile for Any Occasion: Whether it’s a birthday, holiday, or just a cozy night in, this dessert fits every setting. It’s elegant enough for a dinner party yet easy enough for a weeknight treat.
- Make-Ahead Magic: Prepare it the day before and let it chill overnight. The flavors deepen and blend perfectly, creating an even richer taste by the next day.
- Customizable: Add a splash of liqueur for an adult twist, or keep it kid-friendly with a simple coffee soak. You can even swap ingredients to suit dietary needs—gluten-free ladyfingers or dairy-free alternatives work just as well.
This Tiramisu Cheesecake isn’t just a dessert; it’s an experience. It’s creamy, dreamy, and guaranteed to leave everyone asking for seconds. Ready to make it? Let’s gather the ingredients and get started!
What You’ll Need to Make Tiramisu Cheesecake
Before we dive into the magic of making this Tiramisu Cheesecake, let’s gather everything you’ll need. Using high-quality ingredients is key to achieving that rich, authentic flavor. Here’s your shopping list:
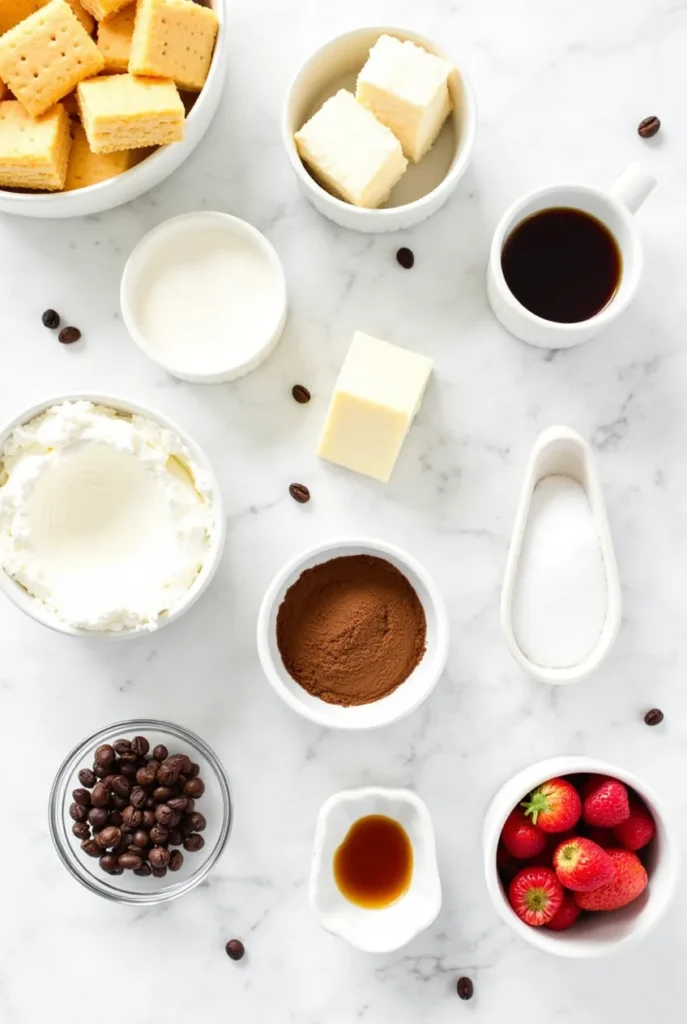
For the Cheesecake Layer:
- 16 oz (450g) of cream cheese, left out to soften for easy blending
- 1 cup (240g) mascarpone cheese, for that signature creamy texture
- 1 cup (200g) granulated sugar, to sweeten the filling
- 1 tsp vanilla extract, for a hint of warmth and aroma
- 1 cup (240ml) heavy cream, whipped to stiff peaks for lightness
For the Tiramisu Layer:
- 24 ladyfinger biscuits (savoiardi), to create the classic base
- 1 cup (240ml) strong espresso coffee, cooled (or substitute with strong brewed coffee)
- 2 tbsp coffee liqueur (optional), for an extra kick of flavor
- 2 tbsp cocoa powder, for dusting and that irresistible chocolate finish
Optional Garnishes:
- Dark chocolate shavings, for a luxurious touch
- A handful of fresh berries, to brighten up the presentation and add a refreshing contrast
Pro Tips for Ingredient Success:
- Room Temperature Matters: Ensure your cream cheese and mascarpone are softened before mixing. This prevents lumps and creates a silky-smooth filling.
- Quality Coffee is Key: Use freshly brewed espresso or high-quality instant coffee for the best flavor. The coffee is the star of the tiramisu layer, so don’t skimp!
- Whipping Cream Perfectly: Chill your mixing bowl and beaters before whipping the cream. This helps it reach stiff peaks faster and holds its shape better.
- Ladyfinger Alternatives: If you can’t find ladyfingers, sponge cake or even graham crackers can work in a pinch—just adjust the soaking time.
With these ingredients and tips, you’re all set to create a dessert that’s as delightful to make as it is to eat. Ready to move on to the fun part? Let’s get started with the instructions!
Step-by-Step Guide to Making Tiramisu Cheesecake
Now that you’ve got all your ingredients ready, it’s time to bring this Tiramisu Cheesecake to life! Don’t worry—I’ll guide you through each step to ensure your dessert turns out perfectly. Let’s get started:
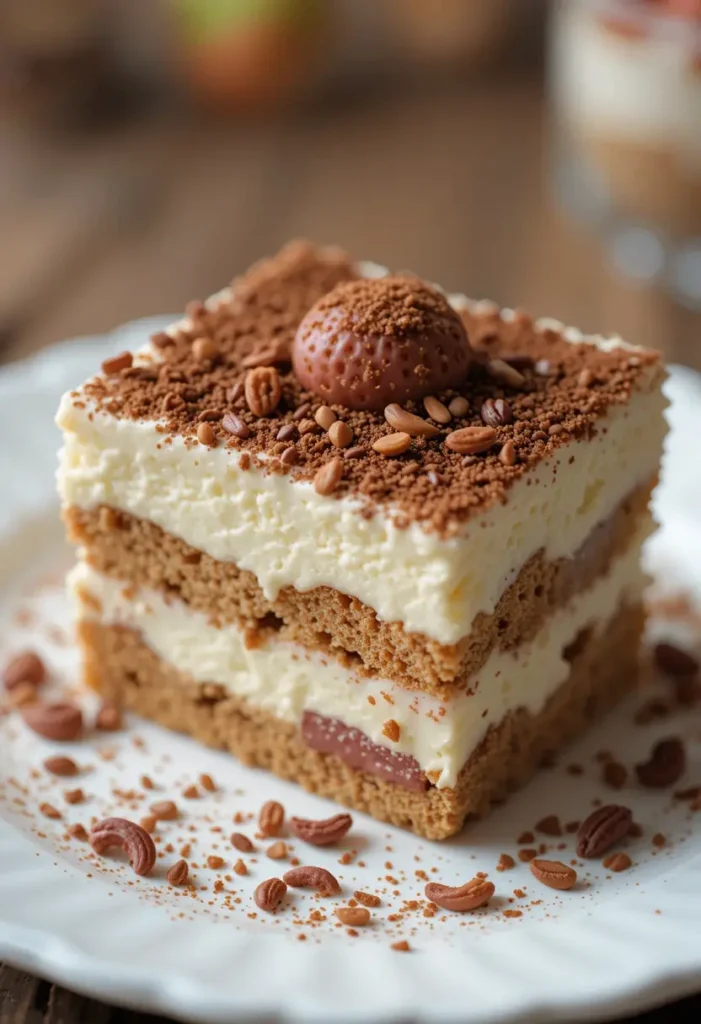
Step 1: Prepare the Cheesecake Filling
- In a large mixing bowl, beat the softened cream cheese and mascarpone together until smooth and creamy.
- Gradually add the granulated sugar and vanilla extract, mixing until fully combined and fluffy.
- In another bowl, use a hand mixer or whisk to beat the heavy cream until it holds firm peaks. Gently fold the whipped cream into the cheese mixture until no streaks remain. Set aside.
Step 2: Assemble the Tiramisu Layer
- Quickly dip each ladyfinger biscuit into the cooled espresso (and coffee liqueur, if using). Be careful not to oversoak them—just a quick dip on each side is enough.
- Arrange a layer of soaked ladyfingers at the bottom of your serving dish or springform pan. This forms the sturdy foundation for your cheesecake.
Step 3: Layer and Chill
- Spread half of the cheesecake filling evenly over the ladyfingers.
- Add another layer of dipped ladyfingers, followed by the remaining cheesecake filling. Use a spatula to create a smooth, even surface on top.
- Cover the dessert with plastic wrap and refrigerate for at least 4–6 hours, or ideally overnight. This allows the flavors to meld and the dessert to set perfectly.
Step 4: Garnish and Serve
- Before serving, dust the top generously with cocoa powder using a fine sieve for an even layer.
- For an extra touch of elegance, sprinkle dark chocolate shavings or add a few fresh berries on top.
Pro Tips for Success:
- Avoid Soggy Ladyfingers: Dip them quickly—just 1–2 seconds per side. Oversoaking can make the base too mushy.
- Smooth Layers: Use an offset spatula to spread the cheesecake filling evenly for a professional look.
- Chill Thoroughly: Patience is key! Letting the dessert chill overnight ensures it holds its shape and enhances the flavors.
And there you have it—a stunning Tiramisu Cheesecake that’s as easy to make as it is impressive to serve. Ready to wow your guests? Let’s move on to some creative variations and serving ideas!
Expert Tips and Creative Twists for Tiramisu Cheesecake
Now that you’ve mastered the basics of this Tiramisu Cheesecake, let’s take it up a notch with some expert tips and creative variations. Whether you’re looking to customize the recipe or troubleshoot common issues, I’ve got you covered!
Pro Tips for Perfect Results
- Balance the Coffee Flavor: If you’re not a fan of strong coffee, dilute the espresso with a bit of water or use a milder brew. For coffee lovers, add a splash of coffee liqueur for an extra kick.
- Avoid Overmixing: When folding the whipped cream into the cheesecake filling, use gentle, sweeping motions to keep the mixture light and airy. Overmixing can deflate the cream and make the filling dense.
- Chill Your Tools: For the best whipped cream, chill your mixing bowl and beaters in the freezer for 10–15 minutes before starting. Cold equipment ensures the cream whips up quickly and maintains its fluffy texture.
- Slice with a Hot Knife: For clean, professional-looking slices, dip a sharp knife in hot water, wipe it dry, and then cut through the cheesecake. Repeat this process for each slice.
Creative Variations to Try
- Chocolate Lover’s Twist: Add a layer of chocolate ganache between the ladyfingers and cheesecake filling. You can also mix cocoa powder into the cheesecake layer for a double chocolate experience.
- Gluten-Free Option: Swap the ladyfingers for gluten-free sponge cake or gluten-free biscuits. Just dip them in espresso as you would with traditional ladyfingers.
- Berry Bliss: Layer fresh raspberries or strawberries between the cheesecake filling for a fruity twist. The tartness of the berries pairs beautifully with the creamy filling.
- Boozy Upgrade: Add a splash of your favorite liqueur—Kahlúa, amaretto, or Baileys—to the espresso dip for an adult-friendly version.
- Mini Cheesecakes: Use individual serving glasses or jars to create single-serve portions. Layer the ingredients as usual, and you’ll have adorable, portable desserts perfect for parties.
Troubleshooting Common Issues
- Soggy Base: If your ladyfingers are too soft, you may have oversoaked them. Remember, a quick dip is all you need!
- Cracked Filling: Overmixing or not chilling the dessert long enough can cause cracks. Be gentle when folding and allow ample chilling time.
- Too Sweet or Too Bitter: Adjust the sugar in the cheesecake filling to suit your taste. If the coffee flavor is too strong, reduce the amount of espresso or dilute it slightly.
With these tips and variations, you can make this Tiramisu Cheesecake truly your own. Whether you stick to the classic recipe or experiment with new flavors, the result will be unforgettable. Ready to serve it up? Let’s move on to some delightful serving suggestions!
How to Serve and Present Tiramisu Cheesecake Like a Pro
Your Tiramisu Cheesecake is ready to shine, and now it’s time to serve it in style! Whether you’re hosting a dinner party or enjoying a cozy night in, these serving ideas will elevate your dessert game and make every bite even more special.
How to Serve Tiramisu Cheesecake
- Classic Elegance: Dust the top with a generous layer of cocoa powder just before serving. Pair it with a cup of freshly brewed espresso or cappuccino for the ultimate Italian dessert experience.
- Garnish with Flair: Add a sprinkle of dark chocolate shavings or a few fresh berries like raspberries or strawberries for a pop of color and freshness. A sprig of mint can also add a touch of sophistication.
- Individual Portions: For a party-friendly option, serve the cheesecake in individual glasses or jars. Layer the ingredients as you would in the full-sized version, and top with a dollop of whipped cream and a dusting of cocoa.
- Seasonal Touches: Adapt your garnishes to the season—think cinnamon and nutmeg in the fall or edible flowers in the spring.
Perfect Pairings
- Coffee or Tea: A strong espresso, latte, or even a chai tea complements the rich flavors of the cheesecake beautifully.
- Dessert Wines: Pair with a sweet dessert wine like Moscato or a creamy liqueur such as Baileys for an indulgent treat.
- Fresh Fruit Platter: Serve alongside a platter of fresh fruit like berries, sliced mango, or kiwi to balance the richness of the cheesecake.
Presentation Tips
- Clean Slices: Use a hot knife to cut neat, even slices. Wipe the knife clean between cuts for a polished look.
- Plate with Care: Place each slice on a dessert plate and add a drizzle of chocolate sauce or a light dusting of powdered sugar for a restaurant-worthy finish.
- Add Texture: A small scoop of vanilla ice cream or a dollop of whipped cream on the side adds contrast and makes the dessert even more inviting.
Storing Leftovers
- Keep It Fresh: Store any leftovers in an airtight container in the refrigerator for up to 3 days. As it sits, the flavors meld together, creating an even richer and more delightful taste by the next day.
- Freezing Option: This cheesecake freezes well! Wrap individual slices tightly in plastic wrap and store in a freezer-safe container for up to 1 month. Thaw in the fridge before serving.
_________________________________________________________________________
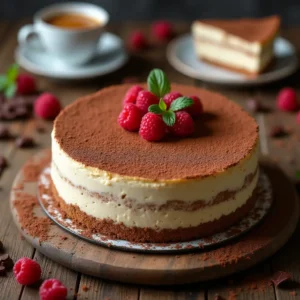
tiramisu cheesecake
Ingredients
- 16 oz 450g cream cheese, softened to room temperature
- 1 cup 240g mascarpone cheese
- 1 cup 200g granulated sugar
- 1 tsp vanilla extract
- 1 cup 240ml heavy cream, whipped to stiff peaks
- 24 ladyfinger biscuits savoiardi
- 1 cup 240ml strong espresso coffee, cooled
- 2 tbsp coffee liqueur optional
- 2 tbsp cocoa powder for dusting
- Fresh berries or chocolate shavings for garnish (optional)
Instructions
Prepare the Cheesecake Filling:
- In a large mixing bowl, beat the softened cream cheese and mascarpone until smooth and creamy.
- Gradually add the granulated sugar and vanilla extract, mixing until fully combined and fluffy.
- In a separate bowl, whip the heavy cream until it forms stiff peaks. Gently fold the whipped cream into the cheese mixture until no streaks remain. Set aside.
Assemble the Tiramisu Layer:
- Quickly dip each ladyfinger biscuit into the cooled espresso (and coffee liqueur, if using). Be careful not to oversoak them—just a quick dip on each side is enough.
- Arrange a layer of soaked ladyfingers at the bottom of your serving dish or springform pan. This forms the base of your cheesecake.
Layer and Chill:
- Spread half of the cheesecake filling evenly over the ladyfingers.
- Add another layer of dipped ladyfingers, followed by the remaining cheesecake filling. Use a spatula to create a smooth, even surface on top.
- Cover the dessert with plastic wrap and refrigerate for at least 4–6 hours, or ideally overnight.
Garnish and Serve:
- Before serving, dust the top generously with cocoa powder using a fine sieve for an even layer.
- For an extra touch of elegance, sprinkle dark chocolate shavings or add a few fresh berries on top.
Notes
- Storage: Store leftovers in an airtight container in the fridge for up to 3 days.
- Freezing: Wrap individual slices tightly in plastic wrap and freeze for up to 1 month. Thaw in the fridge before serving.
- Customization: Add a splash of liqueur, layer with fresh berries, or use gluten-free ladyfingers for dietary preferences.
Notes
- Calories: 320 kcal
- Fat: 22g
- Saturated Fat: 13g
- Protein: 6g
- Carbohydrates: 25g
- Sugar: 18g
- Fiber: 1g
- Cholesterol: 85mg
- Sodium: 120mg
Tiramisu Cheesecake: A Dessert Worth Celebrating
Congratulations—you’ve just created a Tiramisu Cheesecake that’s as stunning as it is delicious! This dessert is the perfect marriage of two classics, combining the creamy richness of cheesecake with the coffee-infused charm of tiramisu. Whether you’re serving it at a special occasion or enjoying it as a treat for yourself, it’s sure to impress.
With its no-bake simplicity, make-ahead convenience, and endless customization options, this recipe is a true crowd-pleaser. Don’t be intimidated by its fancy appearance—it’s surprisingly easy to make and guaranteed to delight everyone who tries it. So go ahead, slice into that creamy, coffee-kissed masterpiece, and savor every bite.
FAQS
What does tiramisu cheesecake taste like?
Tiramisu cheesecake combines the rich, creamy texture of cheesecake with the bold flavors of classic tiramisu. It has a balance of coffee-soaked ladyfingers, mascarpone cheese, and a hint of cocoa, creating a smooth, slightly tangy, and indulgent dessert with deep espresso and chocolate notes.
How long does tiramisu cheesecake last in the fridge?
Properly stored in an airtight container, tiramisu cheesecake lasts 4 to 5 days in the refrigerator. For best quality, keep it chilled and avoid excessive moisture exposure.
What can go wrong when making tiramisu?
Common issues include:
Runny filling due to under-whipped mascarpone or over-soaked ladyfingers.
Grainy texture from over-mixed mascarpone.
Weak coffee flavor if not using strong espresso.
Soggy layers from too much liquid absorption.
How long does tiramisu cake stay fresh?
Tiramisu cake remains fresh for 2 to 4 days in the refrigerator when covered properly. After this period, the texture may soften too much, and flavors can begin to degrade.
What makes tiramisu runny?
Tiramisu can become runny if:
The mascarpone mixture is over-mixed or too warm.
The ladyfingers absorb too much liquid.
The dessert is not properly chilled before serving.

