
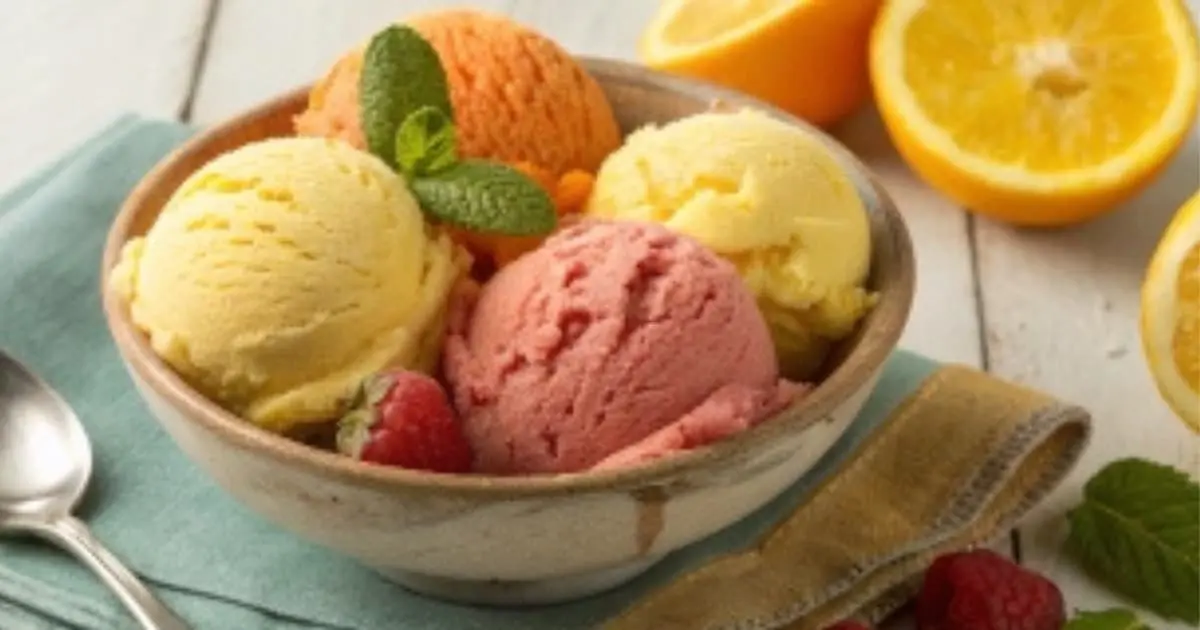
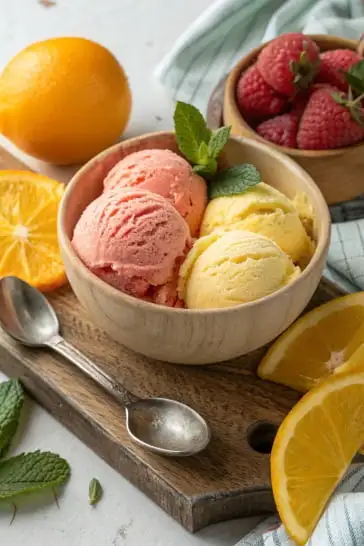
Is there anything more satisfying than a homemade dessert that’s both refreshing and bursting with vibrant flavors? Sherbet ice cream is the ultimate treat—light, creamy, and packed with fruity goodness. Perfect for summer afternoons or a quick pick-me-up, it’s versatile enough to suit any occasion.
With its balance of tangy citrus notes and a silky-smooth texture, sherbet ice cream is a delightful twist on traditional frozen desserts. And the best part? You don’t need fancy equipment or complicated steps to make it! Let’s explore how you can whip up this irresistible treat right in your kitchen
Table of Contents
Key Benefits of Sherbet Ice Cream
Sherbet ice cream isn’t just a refreshing treat—it comes with a few surprising benefits that make it a standout choice for your next dessert! Let’s explore why this tangy, fruity indulgence should be your go-to dessert when you’re craving something cool and satisfying.
1. Lower Fat Content:Unlike traditional ice cream, which can be heavy on cream and sugar, sherbet offers a lighter alternative without compromising on flavor. This makes it a great option for those who are looking to satisfy their sweet tooth without the extra calories. You can enjoy the rich, fruity flavors without feeling too indulgent.
2. Packed with Natural Vitamin C: Sherbet often contains citrus fruits like oranges, lemons, or limes, which are packed with vitamin C. This vitamin not only boosts your immune system but also helps with hydration, making it a refreshing and healthy way to enjoy dessert. The zingy citrus flavors in sherbet offer an extra boost of energy on a warm day!
3. Digestive Benefits: Some sherbet recipes use fruit-based acids and ingredients that can aid digestion. The tangy flavors from the citrus fruits can help to stimulate your digestive system, making it a delicious yet functional treat after a meal.
4. Hydration with a Sweet Twist
Since sherbet is made with fruits that have high water content, it’s a great hydrating treat—especially during hot weather. With the cooling sensation of the ice cream and the hydrating properties of the fruit, sherbet is the perfect way to beat the heat while replenishing your body.
5. Customizable for Dietary Needs
Sherbet is a versatile treat that can be easily tailored to suit various dietary preferences. Whether you’re making a vegan version using coconut milk or opting for a dairy-free option, it’s a dessert that can be enjoyed by almost everyone! You can also adjust the sweetness level by using natural sweeteners, making it a great option for those watching their sugar intake.
6. Simple to Make and Enjoy
Sherbet ice cream is relatively simple to make compared to traditional ice cream, especially if you have an ice cream maker. It’s a fun recipe to make with family or friends, and once you taste it, you’ll see just how easy it is to create your own homemade version of this refreshing dessert.
Whether you’re enjoying it as a solo treat or serving it at a summer gathering, sherbet ice cream offers both flavor and benefits, making it the perfect sweet bite to satisfy both your cravings and your health-conscious side. Ready to dive into making your own batch? Let’s continue with the ingredients!
Ingredients for Sherbet Ice Cream
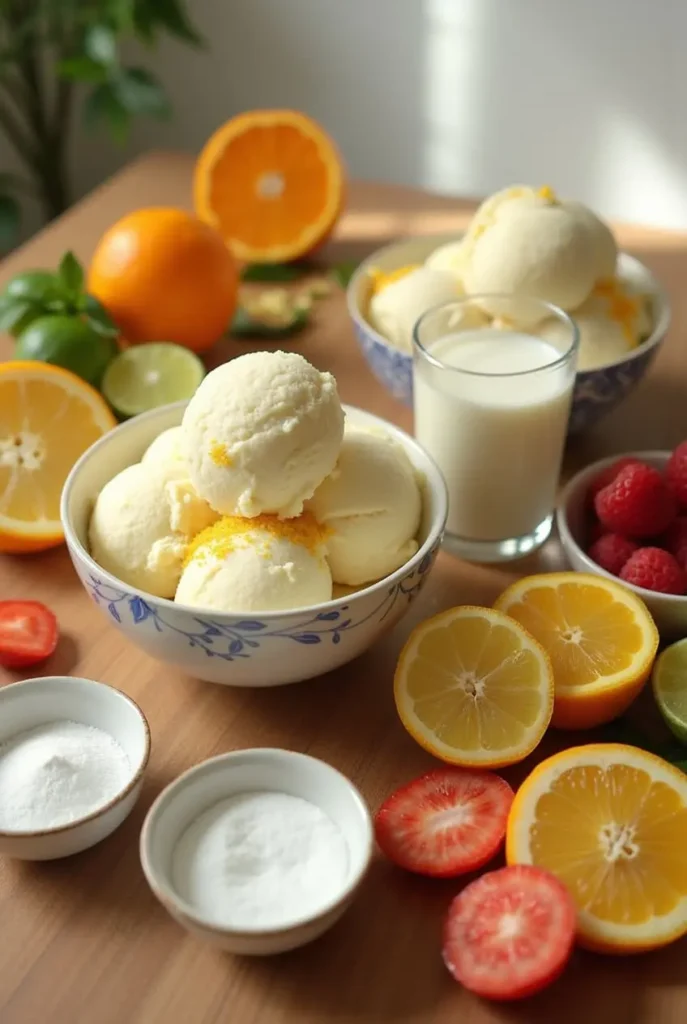
Before we dive into the fun part of making sherbet ice cream, let’s gather all the ingredients you’ll need. This simple, fruity dessert comes together with just a few key ingredients that pack a punch of flavor. Whether you’re making a classic citrus-based sherbet or adding your own twist, these ingredients are your starting point for success.
Basic Ingredients:
- Fresh Citrus Fruits (Oranges, Lemons, Limes) – These are the stars of your sherbet, providing that refreshing, tangy flavor. Feel free to mix and match citrus fruits for a unique twist!
- Sugar – This balances out the tartness of the citrus fruits and helps give the sherbet its smooth texture. You can use white sugar or swap it with natural sweeteners like honey or agave for a healthier alternative.
- Water – This helps to thin out the mixture, making it easier to churn and freeze. If you want to add extra flavor, you can substitute some of the water with fruit juice (like orange or lemon juice).
- Egg Whites – These help to create a lighter, airy texture in your sherbet. If you prefer a dairy-free version, feel free to skip the egg whites or use an egg substitute.
Optional Ingredients:
- Coconut Milk or Almond Milk – For a dairy-free or vegan version of sherbet, coconut milk or almond milk is a great substitute for traditional cream. It adds a creamy texture without the dairy!
- Vanilla Extract – A touch of vanilla extract can round out the citrus flavors and add a subtle depth to your sherbet. It’s optional, but it’s a great way to elevate the flavor profile.
- Fruit Mix-ins – If you want to get creative, add other fruits like strawberries, raspberries, or blueberries. These can add color, texture, and extra flavor to your sherbet.
Pro Tip:
- For an extra burst of flavor, consider zesting your citrus fruits before juicing them. The zest contains essential oils that enhance the fruit’s aroma and flavor, making your sherbet even more fragrant and tangy!
Now that we’ve got everything ready, you’re well on your way to making the most refreshing sherbet ice cream! Keep these ingredients in mind as you prepare to bring this simple yet delicious dessert to life. Next up, we’ll walk through the steps to make this treat in no time!
Instructions for Making Sherbet Ice Cream
Making sherbet ice cream is a delightful process that brings refreshing, fruity flavors to life. Whether you use an ice cream maker or opt for the manual method, the steps are simple and rewarding. Let’s dive in and turn these ingredients into a delicious homemade treat!
Step 1: Prepare the Fruit Base
- Juice Your Citrus
Start by juicing your favorite citrus fruits—think fresh oranges, lemons, or tangy limes. You’ll need about 1 to 2 cups of juice, depending on the quantity you’re making. Don’t hesitate to mix different citrus varieties to create a unique flavor profile! - Add Zest for Extra Punch
Before juicing, grab your zester and add a teaspoon or so of zest from your citrus fruits. The zest packs in the essential oils, giving your sherbet an extra burst of aromatic flavor that will make all the difference. - Strain (Optional)
If you prefer a smooth texture without any pulp, you can strain the juice. This step isn’t necessary, but it does help refine the final product and makes it feel a bit more luxurious.
Step 2: Mix the Ingredients
- Combine Juice and Water
In a medium-sized mixing bowl, combine your citrus juice with water. You can experiment with adding fruit juices (like orange or lemon) in place of some of the water for a more intense fruit flavor. - Stir in the Sugar
Slowly add sugar to the mixture, stirring constantly until it dissolves completely. Start with about 1/2 cup of sugar, and taste the mixture as you go, adjusting to your sweetness preference. Remember, sherbet should be a nice balance of tangy and sweet! - Whisk in Egg Whites (Optional)
For a fluffier texture, beat egg whites until they form soft peaks and gently fold them into your citrus mixture. This will add an airy, light texture to your sherbet. If you’re skipping eggs, you can try using aquafaba (chickpea brine) as an alternative.
Step 3: Freeze the Mixture
- Churn with an Ice Cream Maker
If you have an ice cream maker, simply pour your citrus mixture into the machine and churn according to the manufacturer’s instructions. This should take about 20-30 minutes, and you’ll have a creamy, smooth sherbet by the end. - Freeze without an Ice Cream Maker
No ice cream maker? No problem! Pour the mixture into a shallow, freezer-safe container. Place it in the freezer and stir with a fork every 30 minutes to break up any ice crystals. Repeat this process for 2-3 hours until your sherbet reaches a firm yet scoopable texture.
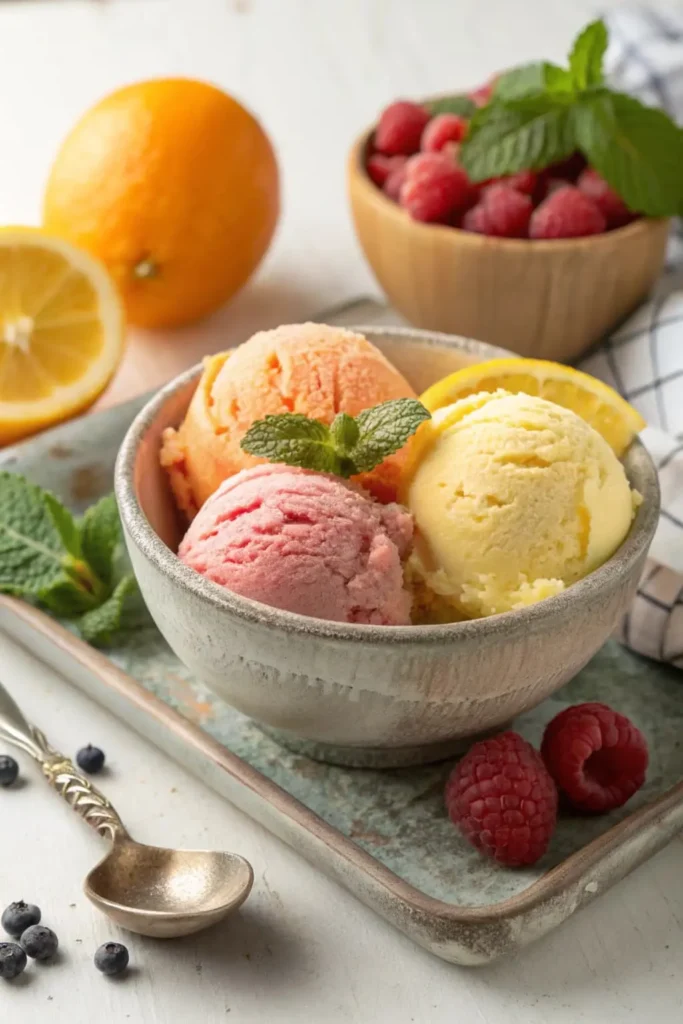
Step 4: Serve and Enjoy
Once your sherbet has frozen to perfection, it’s time to serve! Scoop it into bowls or cones, and feel free to add extra garnishes like fresh mint, fruit slices, or a drizzle of honey for a little extra flair.
Pro Tip:
Before serving, let your sherbet sit out for a few minutes to soften slightly. This will make it easier to scoop and enhance the overall texture, making each bite smooth and refreshing.
Now, you’re ready to enjoy a homemade sherbet ice cream that’s both refreshing and full of flavor. Whether you’re enjoying it on a warm day or serving it at a gathering, this dessert will definitely impress!
Pro Tips and Variations for Sherbet Ice Cream
Creating your own sherbet ice cream at home opens up endless possibilities for creativity. Here are some tips and variations that will elevate your sherbet game, whether you want to tweak the flavor, try a different texture, or make the recipe even more exciting!
Pro Tips for Perfect Sherbet
- Use Fresh Ingredients
Freshly squeezed juice makes a huge difference in flavor. Try to avoid using store-bought juice for the most vibrant and natural taste. The fresher your ingredients, the more flavorful your sherbet will be! - Don’t Overload on Sweetener
Sherbet should strike the perfect balance between tangy citrus and sweet. Start with a small amount of sugar and taste as you go—this allows you to tailor the sweetness to your preference without overpowering the natural tartness of the fruit. - Chill Your Base First
If you’re using an ice cream maker, it’s a good idea to chill the mixture for 1-2 hours before churning. This helps it freeze more quickly, resulting in a smoother texture. It’s an optional step but can improve the overall consistency of your sherbet. - Use an Egg Substitute for Vegan or Dairy-Free Options
If you’re making a dairy-free or vegan version, swapping egg whites with aquafaba (the liquid from canned chickpeas) works wonders. It will help you achieve that light and fluffy texture typical of sherbet, without using any animal products.
Flavor Variations to Try
- Berry Citrus Sherbet
Add some crushed berries—strawberries, blueberries, or raspberries—to your citrus base for a delightful berry-citrus combo. Simply mash or puree the berries and mix them into the citrus juice before adding sugar. This twist will add depth and color to your sherbet. - Tropical Twist
For a tropical vacation in a bowl, blend in mango, pineapple, or coconut milk to your citrus base. These fruits complement citrus beautifully and give your sherbet a rich, exotic taste. You can also add some shredded coconut for texture! - Herb-Infused Sherbet
If you’re feeling adventurous, try infusing your citrus juice with herbs like mint, basil, or thyme. Gently heat the juice with the herbs and let it steep before straining. This subtle flavor enhancement will take your sherbet to a whole new level. - Sparkling Sherbet
Add a fizzy touch by mixing in some sparkling water or lemon soda. The bubbles will not only enhance the sherbet’s texture but also give it an extra layer of refreshment, making it perfect for summer gatherings or festive occasions.
Texture Variations
- Creamy Citrus Sherbet
If you prefer a creamier texture, feel free to mix in some dairy or dairy alternatives like coconut milk or almond milk. This will give your sherbet a rich, ice cream-like consistency while keeping the citrus flavor front and center. - Chunky Fruit Add-ins
For a little extra texture, try adding small chunks of fresh fruit or candied ginger to the mixture before freezing. It’ll add little bursts of flavor and make each bite even more exciting.
Storage Tips
- Freezing
Homemade sherbet can be stored in an airtight container in the freezer for up to 2 weeks. Be sure to cover the surface with plastic wrap or wax paper to prevent ice crystals from forming. - Scoopability
If your sherbet hardens too much in the freezer, just let it sit out for a few minutes before scooping to achieve the perfect texture.
By following these pro tips and variations, you can customize your sherbet to suit your taste and dietary needs. The best part about making your own sherbet ice cream is the freedom to explore new flavors and textures while still enjoying a refreshing, fruity treat. Whether you stick to the classic citrus base or get creative with tropical twists, your homemade sherbet will surely impress every time.
Serving Suggestions
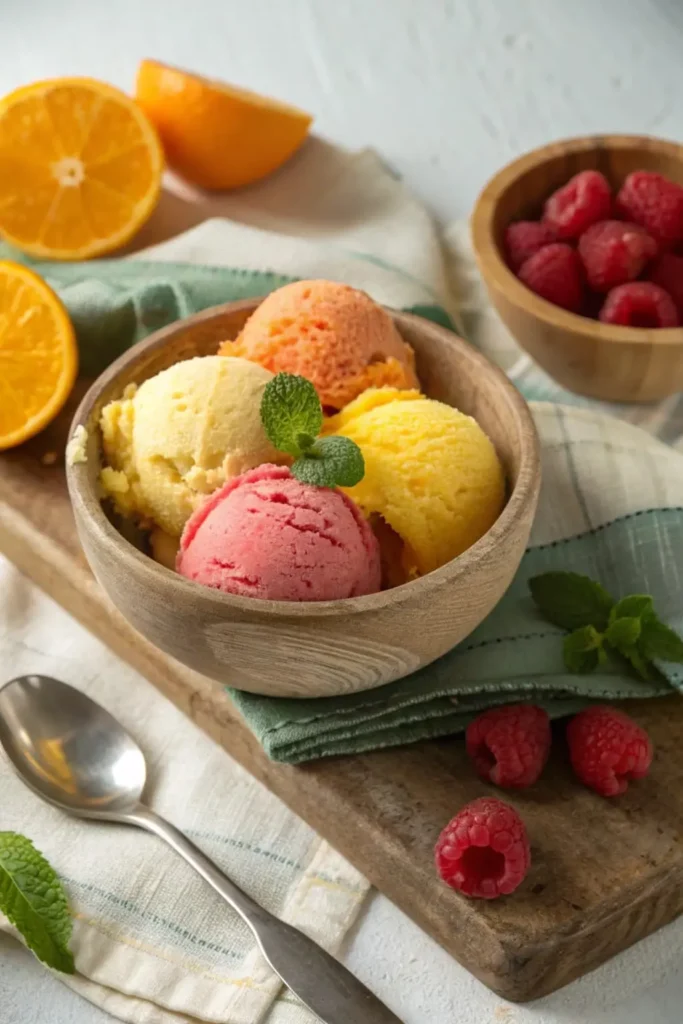
Sherbet ice cream is a wonderfully refreshing treat that offers endless possibilities for creative and delicious serving ideas. Whether you’re entertaining guests, enjoying a casual afternoon, or looking to impress at a special occasion, there are so many ways to present this bright and tangy dessert. Let’s explore some fun and easy ways to serve your homemade sherbet!
Classic Serve: Simple Yet Delicious
Sometimes, simplicity is best. Serving your sherbet in a classic bowl or cone is a great way to let its natural flavors shine.
- Serving Idea: Scoop your sherbet into a bowl or sugar cone and garnish with fresh fruit like strawberries, blueberries, or slices of citrus to complement the flavor.
- Tip: You can drizzle a little honey or agave syrup for added sweetness and serve with a mint sprig for an extra touch of freshness.
Sherbet Sundaes: A Treat with Toppings
Transform your sherbet into an indulgent sundae by adding toppings! This is the perfect option for those who enjoy customizing their desserts.
- Toppings to Try: Fresh berries, chocolate chips, chopped nuts, granola, or a dollop of whipped cream.
- Tip: For extra flavor, consider adding a drizzle of fruit syrup or a sprinkle of cinnamon or toasted coconut. These small touches will elevate your sundae experience.
Sherbet Floats: A Fizzy Delight
A sherbet float combines the creamy tanginess of sherbet with the effervescence of sparkling drinks, making it an exciting and refreshing choice, especially on hot days.
- How to Make It: Simply scoop a generous portion of sherbet into a glass and top with sparkling water, lemon-lime soda, or club soda.
- Variation: Try pairing your sherbet with a flavored soda like orange or ginger ale for an extra layer of flavor.
Layered Sherbet Parfaits: Elegant and Flavorful
Layered parfaits are both visually appealing and delicious. They’re perfect for showcasing the texture and color of your sherbet while adding variety to each bite.
- How to Build It: Layer sherbet with whipped cream, Greek yogurt, or even crumbled cake. You can also add fresh fruit like kiwi, raspberries, or mango to add brightness and flavor to each layer.
- Tip: Use a clear glass so the colorful layers are visible. It creates a stunning dessert that’s sure to impress your guests!
Sherbet Popsicles: Frozen Fun for All Ages
Sherbet popsicles are a playful, fun way to serve your frozen treat, especially for kids or at summer parties. These handheld delights are easy to make and enjoy.
- How to Make Them: Pour your sherbet mixture into popsicle molds and freeze until solid. You can also add pieces of fresh fruit like berries or citrus slices to the mold for a beautiful and flavorful touch.
- Tip: For an extra burst of flavor, dip your sherbet popsicles in melted chocolate and sprinkle with chopped nuts or sprinkles.
Sherbet Smoothie: A Refreshing Twist
A sherbet smoothie is a quick and refreshing option for breakfast or as a light dessert. This easy-to-make treat combines the creamy texture of sherbet with the goodness of fruit.
- How to Make It: Blend a scoop or two of sherbet with some frozen fruit like berries or mango, and add a splash of coconut water or orange juice.
- Tip: Add a handful of spinach or kale for a sneaky nutritional boost—trust us, you won’t taste it!
Decorative Touches for Special Occasions
For special events like birthdays or holiday gatherings, making your sherbet look extra festive can really make it stand out.
- Edible Flowers: Top your sherbet with edible flowers like violets, pansies, or marigolds for an elegant, nature-inspired look.
- Sprinkles and Chocolate Shavings: Add colorful sprinkles, chocolate curls, or gold leaf for an extra touch of glamour.
- Citrus Garnishes: Slices of lime, lemon, or orange can beautifully complement the flavor while adding a touch of sophistication.
Storage and Scoopability Tips
When it comes to storing your homemade sherbet, it’s important to remember that it may harden in the freezer. Here’s how to keep it smooth and scoopable:
- Storage Tip: Store your sherbet in an airtight container to prevent ice crystals from forming. Place plastic wrap directly over the surface of the sherbet before closing the lid for extra protection.
- Scoopability Tip: If your sherbet becomes too firm, let it sit at room temperature for a few minutes before scooping. This will allow it to soften slightly for easier serving.
With these serving suggestions, your homemade sherbet will become the star of any occasion. Whether you’re serving it in a simple cone, making a float, or creating an elegant parfait, there’s no shortage of creative ways to enjoy this zesty and refreshing treat. So go ahead—mix, match, and have fun while savoring the fruity goodness of your very own sherbet ice cream!
_______________________________________________
Sherbet Ice Cream
Ingredients
- gredients:
- 2 cups: Fresh or Frozen Fruit e.g., strawberries, raspberries, oranges, or a mix
- ¾ cup: Granulated Sugar or to taste
- 1 tablespoon: Lemon Juice freshly squeezed
- 1 cup: Whole Milk or dairy-free alternative like almond or coconut milk
- 1 cup: Heavy Cream for a rich, creamy texture; use coconut cream for a vegan option
- 1 tablespoon: Corn Syrup optional, for smoother texture
- 1 teaspoon: Vanilla Extract optional, enhances the flavor
- 1 tablespoon: Mint Leaves optional, finely chopped
Instructions
Instructions:
- Prepare the Fruit: If you’re using fresh fruit, wash it thoroughly and cut it into smaller pieces. If using frozen fruit, let it thaw for a few minutes.
- Blend the Ingredients: Place the fruit, sugar, lemon juice, milk, cream, and corn syrup (if using) into a blender. Blend until smooth and creamy.
- Add Flavorings: Stir in the vanilla extract, mint leaves (if using), and alcohol (optional).
- Freeze: Pour the mixture into a shallow, freezer-safe container. Cover and place it in the freezer.
- Stir Regularly: After 30 minutes, use a fork to scrape and stir the mixture every 30 minutes for the next 2-3 hours. This helps break up any ice crystals and ensures a smooth texture.
- Serve: Once the sherbet is fully frozen and smooth, scoop into bowls or cones and serve!
Notes
Nutrition Information (Per Serving)
- Calories: 200 kcal
- Fat: 10g
- Saturated Fat: 6g
- Cholesterol: 30mg
- Sodium: 30mg
- Carbohydrates: 28g
- Dietary Fiber: 1g
- Sugars: 23g
- Protein: 2g
- Vitamin C: 20% of Daily Value (varies based on fruit used)
- Calcium: 8% of Daily Value
Conclusion
Sherbet ice cream is a delightful and refreshing treat that brings a burst of citrusy goodness to any occasion. Whether you’re enjoying it on a hot summer day or serving it at a special gathering, this homemade sherbet recipe is guaranteed to impress. With its smooth texture and vibrant flavors, it’s a perfect alternative to traditional ice cream, offering a unique twist on classic frozen desserts.
By making sherbet at home, you not only get to customize the flavor to your liking but also enjoy the satisfaction of creating something delicious from scratch. The process is simple, and the result is a vibrant, tangy treat that everyone will love.
So, what are you waiting for? Grab your ingredients, get creative, and treat yourself and your loved ones to this refreshing, homemade sherbet ice cream. Trust us, once you try it, you’ll be hooked on this easy, fun, and flavorful dessert!
FAQs
1. How long can I store homemade sherbet?
Homemade sherbet can stay fresh in the freezer for up to 2-3 weeks. However, for the best texture and flavor, try to consume it within the first week. Be sure to store it in an airtight container to maintain its quality and prevent freezer burn.
2. Can I add alcohol to my sherbet?
Yes! Adding a splash of alcohol can enhance the flavor of your sherbet. A little bit of rum, vodka, or fruit liqueur (like Grand Marnier) can elevate the taste. Just be careful not to add too much, as alcohol can interfere with the freezing process. A tablespoon or two should do the trick for a subtle yet delightful flavor.
3. What if I don’t have fresh fruit? Can I use frozen fruit instead?
Frozen fruit is a great substitute for fresh fruit, and it can actually be more convenient! Simply thaw the frozen fruit slightly before blending to make it easier to incorporate into your sherbet mixture. Plus, frozen fruit is often available year-round and tends to be more affordable than fresh fruit.